WhatsApp is one of the most used messaging apps and it has a whole lot of features to send text, images, documents etc. but have you ever stayed awake just to send someone a birthday wish. Sometimes we remember that we have to send an important message to someone a day later but then we forget and we wish if we had some kind of scheduling feature in WhatsApp too. But don’t worry; we can use this feature in WhatsApp. Though WhatsApp does not have this feature in built but we have a lot of other options which will do the same. All you need to do is just stick to this article and learn how to schedule your messages in WhatsApp. Scheduling the messages will automatically send it to the recipient you want at the decided time. It has a lot of benefits. We may need scheduling in order to remember something important like some business meeting or event or to remember someone’s birthday or anniversary. We can schedule months before that is we can decide the message recipient, message body and the time our self.
There are different ways to schedule WhatsApp messages. Don’t try to rush, just follow the article and have patience as soon you will to know about this. Choose the one you like from the ways listed below.
- Method 1 : Scheduling using GBWhatsApp
GBWhatsApp has a lot of features. GBWhatsApp is a modified WhatsApp APK. It is available for free on all major play stores. It can be easily download from the app stores and its installation is same as that of original WhatsApp. It has all the features which original WhatsApp has plus some more features as well.
To schedule any WhatsApp message using GBWhatsApp, follow the steps below:
- Step – 1 : Download GBWhatsApp
You can download the GBWhatsApp from the play store. It is free of cost.
- Step – 2 : Install GBWhatsApp
The installation process for GBWhatsApp is very simple and easy. It is same as that of original WhatsApp. All you need to do is to accept the terms and condition and enter the mobile number with the country code and then verify it by confirming the OTP send to you via the SMS or WhatsApp call.
- Step – 3 : Select the option for scheduling messages
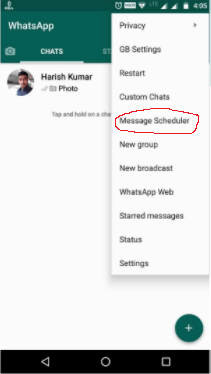
Once the installation has been done and GBWhatsApp starts working properly, open GBWhatsApp and click on the icon with three dots at the top of the app screen. Then select an option to schedule messages by clicking on message scheduler.
- Step – 4 : Select recipient for whom you want the messages to be scheduled
Click on the icon with a ‘+’ made on it and select the recipient to whom you want to send the scheduled message.
- Step – 5 : Write the message you want to send and set the timings
Write the message that needs to be sent after selecting the recipient and then set the timings. The message will be sent automatically to the selected recipient on the time that you scheduled.
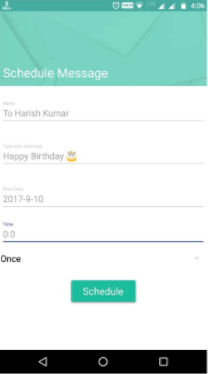
- Step – 6 : Click on schedule
Once you have filled all the details mentioned in the above step, click on schedule and thus your messages has been successfully scheduled and you have to just sit back and don’t need to remember anything. The scheduler will automatically send the messages at the schedule set by you.
- Method – 2 : WhatsApp Scheduler app
You can automatically schedule the WhatsApp messages of the original WhatsApp account only. All you need to do is to just download and install a third party application called ‘WhatsApp Scheduler’.
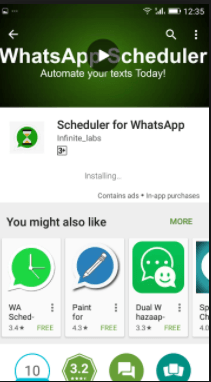
WhatsApp Scheduler is available for free of cost. It is available on the app stores and it is easy and quick to download. There is not rooting required that is you don’t need to root your mobile device for using this app. This app can send the messages which can be simple text or any video or audio to a recipient at the scheduled time.
Steps for scheduling WhatsApp messages by this method are:
- Step – 1 : Download WhatsApp Scheduler app
Download this application from the app store. It is available for free of cost.
- Step – 2 : Install WhatsApp Scheduler app
It has an easy installation process. Follow the steps asked by the app provider and you will get the app to use once it gets installed successfully.
- Step – 3 : Select recipient
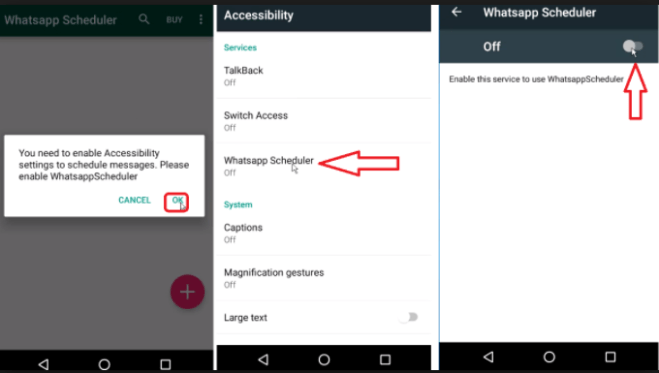
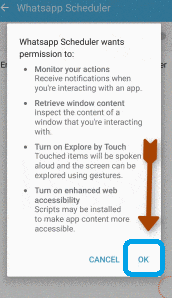
Open up the app from your handset. Adjust all the settings that are required to this application to work. Then click ok and then proceed. To create a new schedule, click on an icon shown as ‘+’ and select the recipient to whom you want to send the message.
- Step – 4: Set message and date and time
Set up the message details and time that is the message body and the date and time at which you want that message to be sent.
- Step – 5 : Click on schedule
Click on the schedule button. Thus your message has been scheduled and it will be sent automatically at that time.

Is there a schedule training for bread making this coming June 2018?